Preparing Your Fishing Line
Disclosure:
We are a participant in affiliate advertising programs designed to provide a means for us to earn commissions by linking to affiliated sites. As a partner of these programs, we may earn from qualifying purchases made through the links on our website. Thank you for your support!
Preparing your fishing line properly is a critical step for being successful while fishing. There are several important steps to follow, including rigging your line, stripping the old line, and adding weights or sinkers. Each step requires attention to detail and proper technique to ensure that your line is ready for fishing. In this answer, we will explore the different aspects of preparing your line.
Complete Fishing Line Setup
Best for: Anglers wanting reliable line performance
- Step-by-step guidance
- Multiple line types covered
- Pro tips included
Step 0 – Check out your fishing line
Fishing line is essential in any angler’s tackle box. Replace your fishing line regularly to maintain its effectiveness. Knowing when to change your fishing line can be challenging, but there are a few signs to look out for. Here are some YGG tips on when to change your fishing line and how to tell if it’s old:
Each fishing line has different replacement requirements. Make sure your line is always primed and ready by reviewing the manufacturer’s recommendations. However, there are some general signs that apply to most types of fishing lines:
- Discoloration: If the line has turned yellow or brown, it’s a sign that it’s old and needs to be replaced.
- Stiffness: If the line feels stiff or brittle, it’s a sign that it’s gone bad and should be replaced.
- Frayed or fuzzy: If your fishing line is frayed, that weakens it significantly. It’s essential to replace it immediately to avoid breakage and lost fish.
It’s recommended that anglers replace their fishing line regularly to ensure maximum effectiveness and safety. Depending on how often you fish and the type of fishing line you’re using, it’s suggested to replace your fishing line every three to six months.
In conclusion, anglers should change their fishing line when they notice discoloration, stiffness, or fraying. Replace your fishing line every three to six months, depending on how often you fish and the type of fishing line you’re using.
Step 1 – Select your fishing line
In preparing the fishing line for a spinning reel, you need to first choose the type of fishing line you want to use, such as mono, fluoro, or braid. If you don’t know what that means that is ok. Here’s a simple breakdown of the differences between mono, fluoro, and braid fishing lines, along with their pros and cons, and top recommendations for each type:
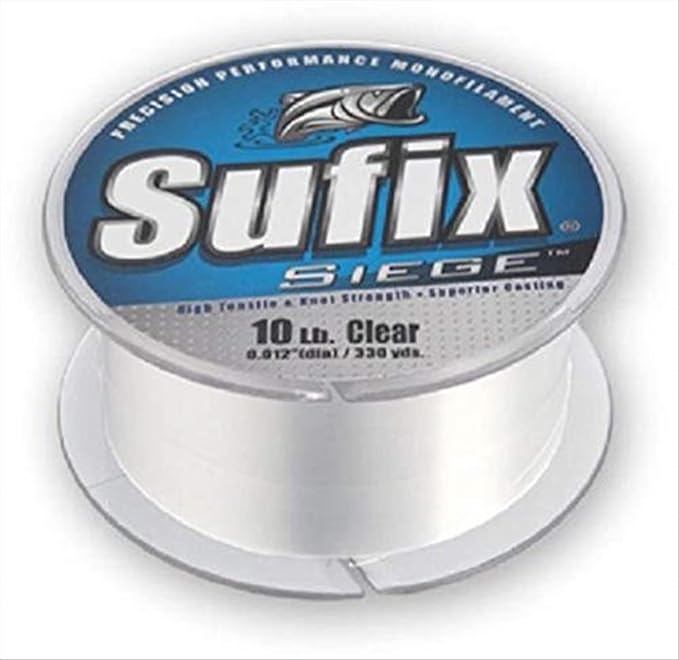
Mono:
- Mono, short for monofilament, is a type of fishing line made from a single strand of nylon.
- Pros: Mono is very versatile and can be used for a wide range of fishing applications. It also has good stretch, which can help absorb the shock of a fish strike and prevent the line from breaking. Mono is generally the least expensive type of fishing line.
- Cons: Mono has more stretch than fluoro or braid, which can make it harder to feel subtle bites or detect changes in bottom structure. It also tends to absorb water, which can weaken the line over time.
- Top recommendations:


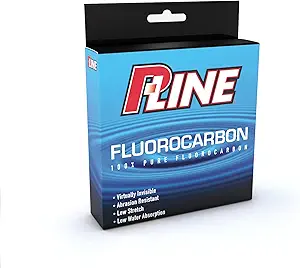
Fluoro:
- Fluoro, short for fluorocarbon, is a type of fishing line that is virtually invisible in water due to its refractive properties.
- Pros: Fluoro is very sensitive and has less stretch than mono, which makes it easier to feel bites and detect changes in structure. It also has good abrasion resistance and is less visible to fish than mono or braid.
- Cons: Fluoro is generally stiffer than mono, which can make it harder to cast and handle. It is also more expensive than mono and has less knot strength than braid.
- Top recommendations:

Braid:
- Braid is a type of fishing line made from multiple strands of synthetic material (such as Spectra or Dyneema) woven together.
- Pros: Braid has almost no stretch, which makes it very sensitive and allows for excellent hooksets. It is also very strong for its diameter and has good abrasion resistance. Braid floats on water, which can be an advantage in certain situations.
- Cons: Braid is generally more visible to fish than fluoro or mono, which can make it harder to fool wary fish. It can also be prone to wind knots and tangles if not spooled correctly. Braid is the most expensive type of line.
- Top recommendations:


It’s important to choose the right type of line for your fishing situation and the species you’re targeting. Mono may be a good choice for beginners or for fishing in murky water. Fluoro or Braid lines may be better suited for clear water or finesse presentations. It’s also important to choose the right pound test for your line based on the weight of the fish. A preventable snapped line is always a quick way to have a bad fishing day.
Step 2 – Spool your line onto the reel
Once you have your line, you can then begin to spool it onto the reel.
Look at your reel to determine the direction in which to spool the line correctly. Next, carefully attach the line to the spool and reel it in until it is filled halfway. For braided lines, thread the line through the first eyelet and attach it to the monofilament line using a double-uni knot.
In addition, make sure the line is spooled on evenly and with some tension to prevent line twists and tangles. Some anglers suggest spooling the line with the label facing up so that it comes off the spool in the same orientation as it was put on, reducing twist.
The “best way” to spool a reel, it can vary based on personal preference and the type of line being used. It is important to follow the manufacturer’s instructions and recommendations for spooling your specific reel and line.
Step 3 – Threading your line
Start by threading the first 15 feet of line through each of the eye holes on the rod, starting at the tip and working your way down to the base where the reel is located. Lastly, reel in the line and watch it to make sure it is evenly distributed.
Step 4 – Open the ball and tie the knot
Next, open the bail and tie the line to the spool with an arbor knot, which will help secure it in place.
Here are the general steps to tie an arbor knot:
- Loop the end of the fishing line around the spool of the reel.
- Tie an overhand knot in the line.
- Tie another overhand knot in the tag end of the line.
- Pull both knots tight so that they meet, but don’t overlap.
- Hold the standing line and pull the tag end to slide the knots toward the spool.
- Trim any excess tag end.
Close the bail and begin winding the line onto the spool, making sure to apply even tension as you go.
Step 5 – Trim your line
Finally, trim the excess line and you’re ready to start fishing!
Properly preparing your line is essential to have a successful and enjoyable fishing experience. By carefully following the steps to rig your line, including attaching a weight or sinker and ensuring it is securely in place, you can increase your chances of catching the fish you desire. Additionally, taking the time to properly spool and maintain your fishing line will help ensure that it is strong and durable, reducing the likelihood of line breaks or other mishaps. By paying attention to these important details, you can improve your chances of success and fully enjoy the sport of fishing.
0 Comments